Here’s a quick guide to get you started with Azure Boards and Azure Repos (Git)
Prerequisites
- Install and configure Git on your computer. Here is a Git Installation Guide.
- Have an Azure DevOps account.
Getting Started
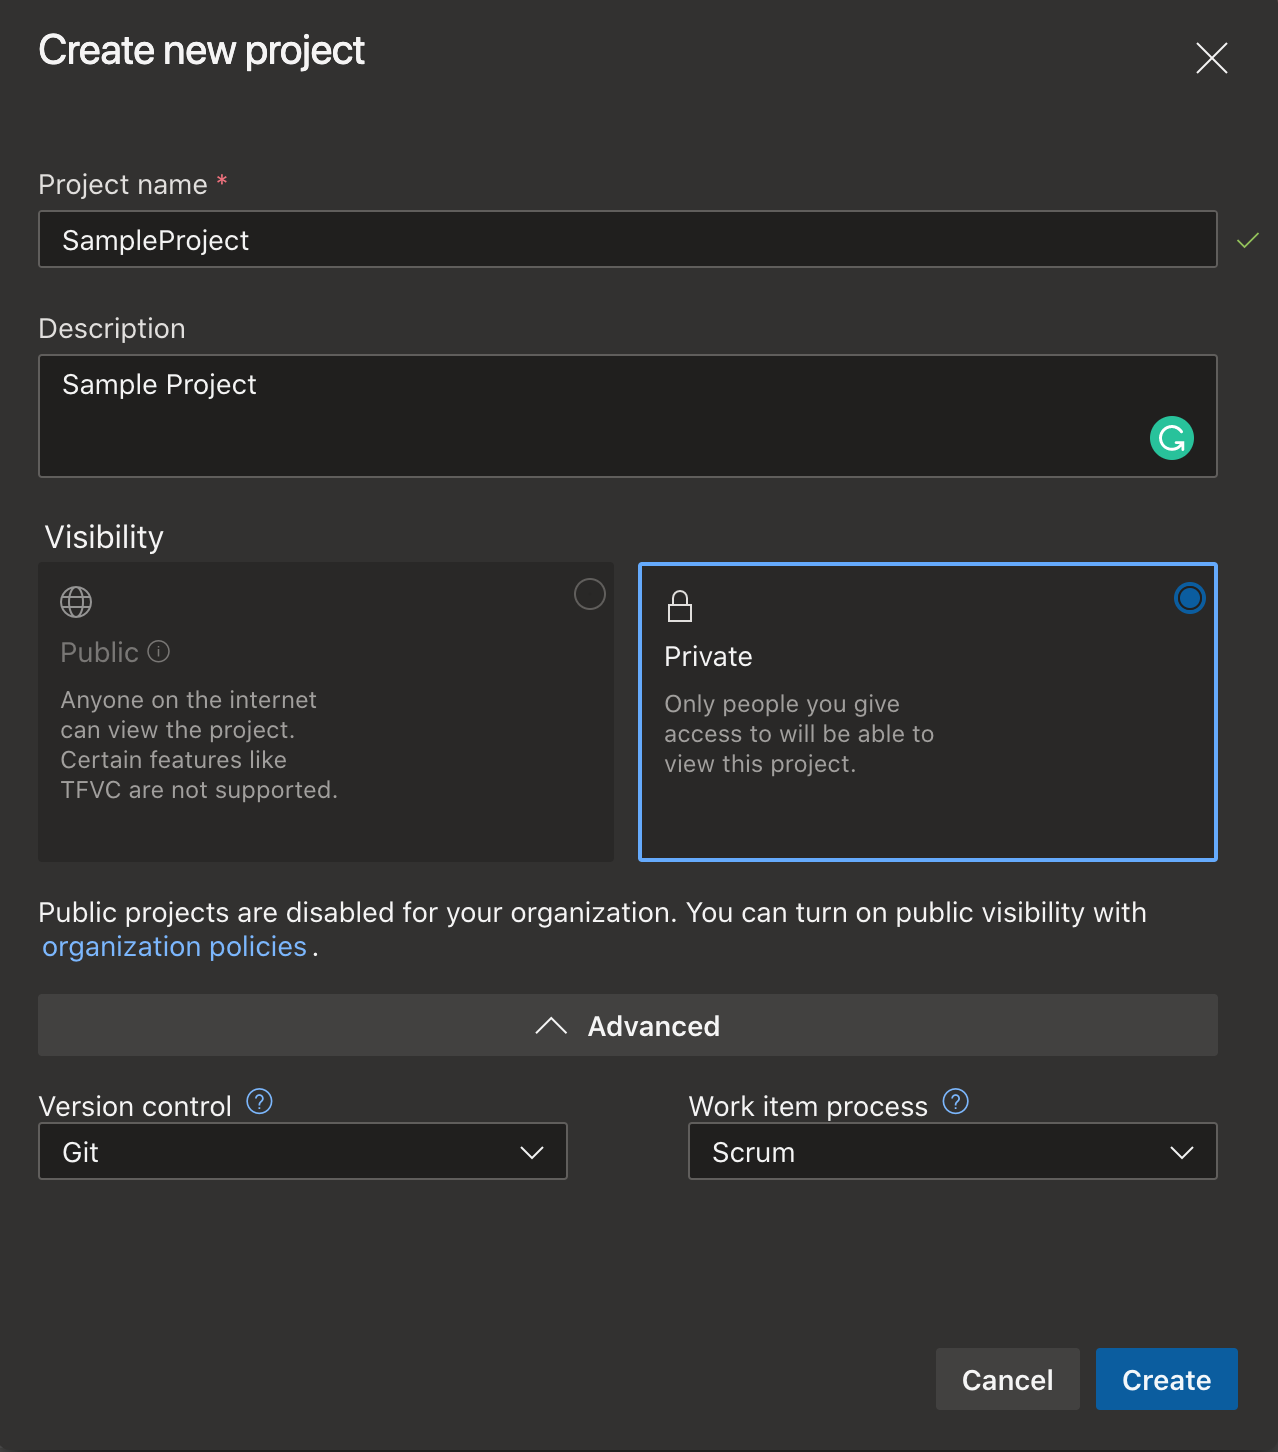
Navigate to Azure DevOps Home located at https://dev.azure.com/<organization>, and create a New Project. Choose the work item process template that reflects your development methodology. You can find more about work item process templates here.
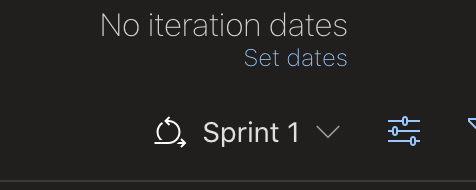
Next, navigate to Boards - > Sprints and define the dates for the current sprint by selecting Set dates.
The project is now configured.
Configure Local Development Environment
Next, navigate to Repos -> Files and hit the Clone button. There is a dropdown option to select your favorite IDE and clone to it.


Alternatively, open the Git command window and execute the following command on your machine at the location where you would like to clone the repo.
git clone https://dev.azure.com/<organization>/<Project Name>/_git/
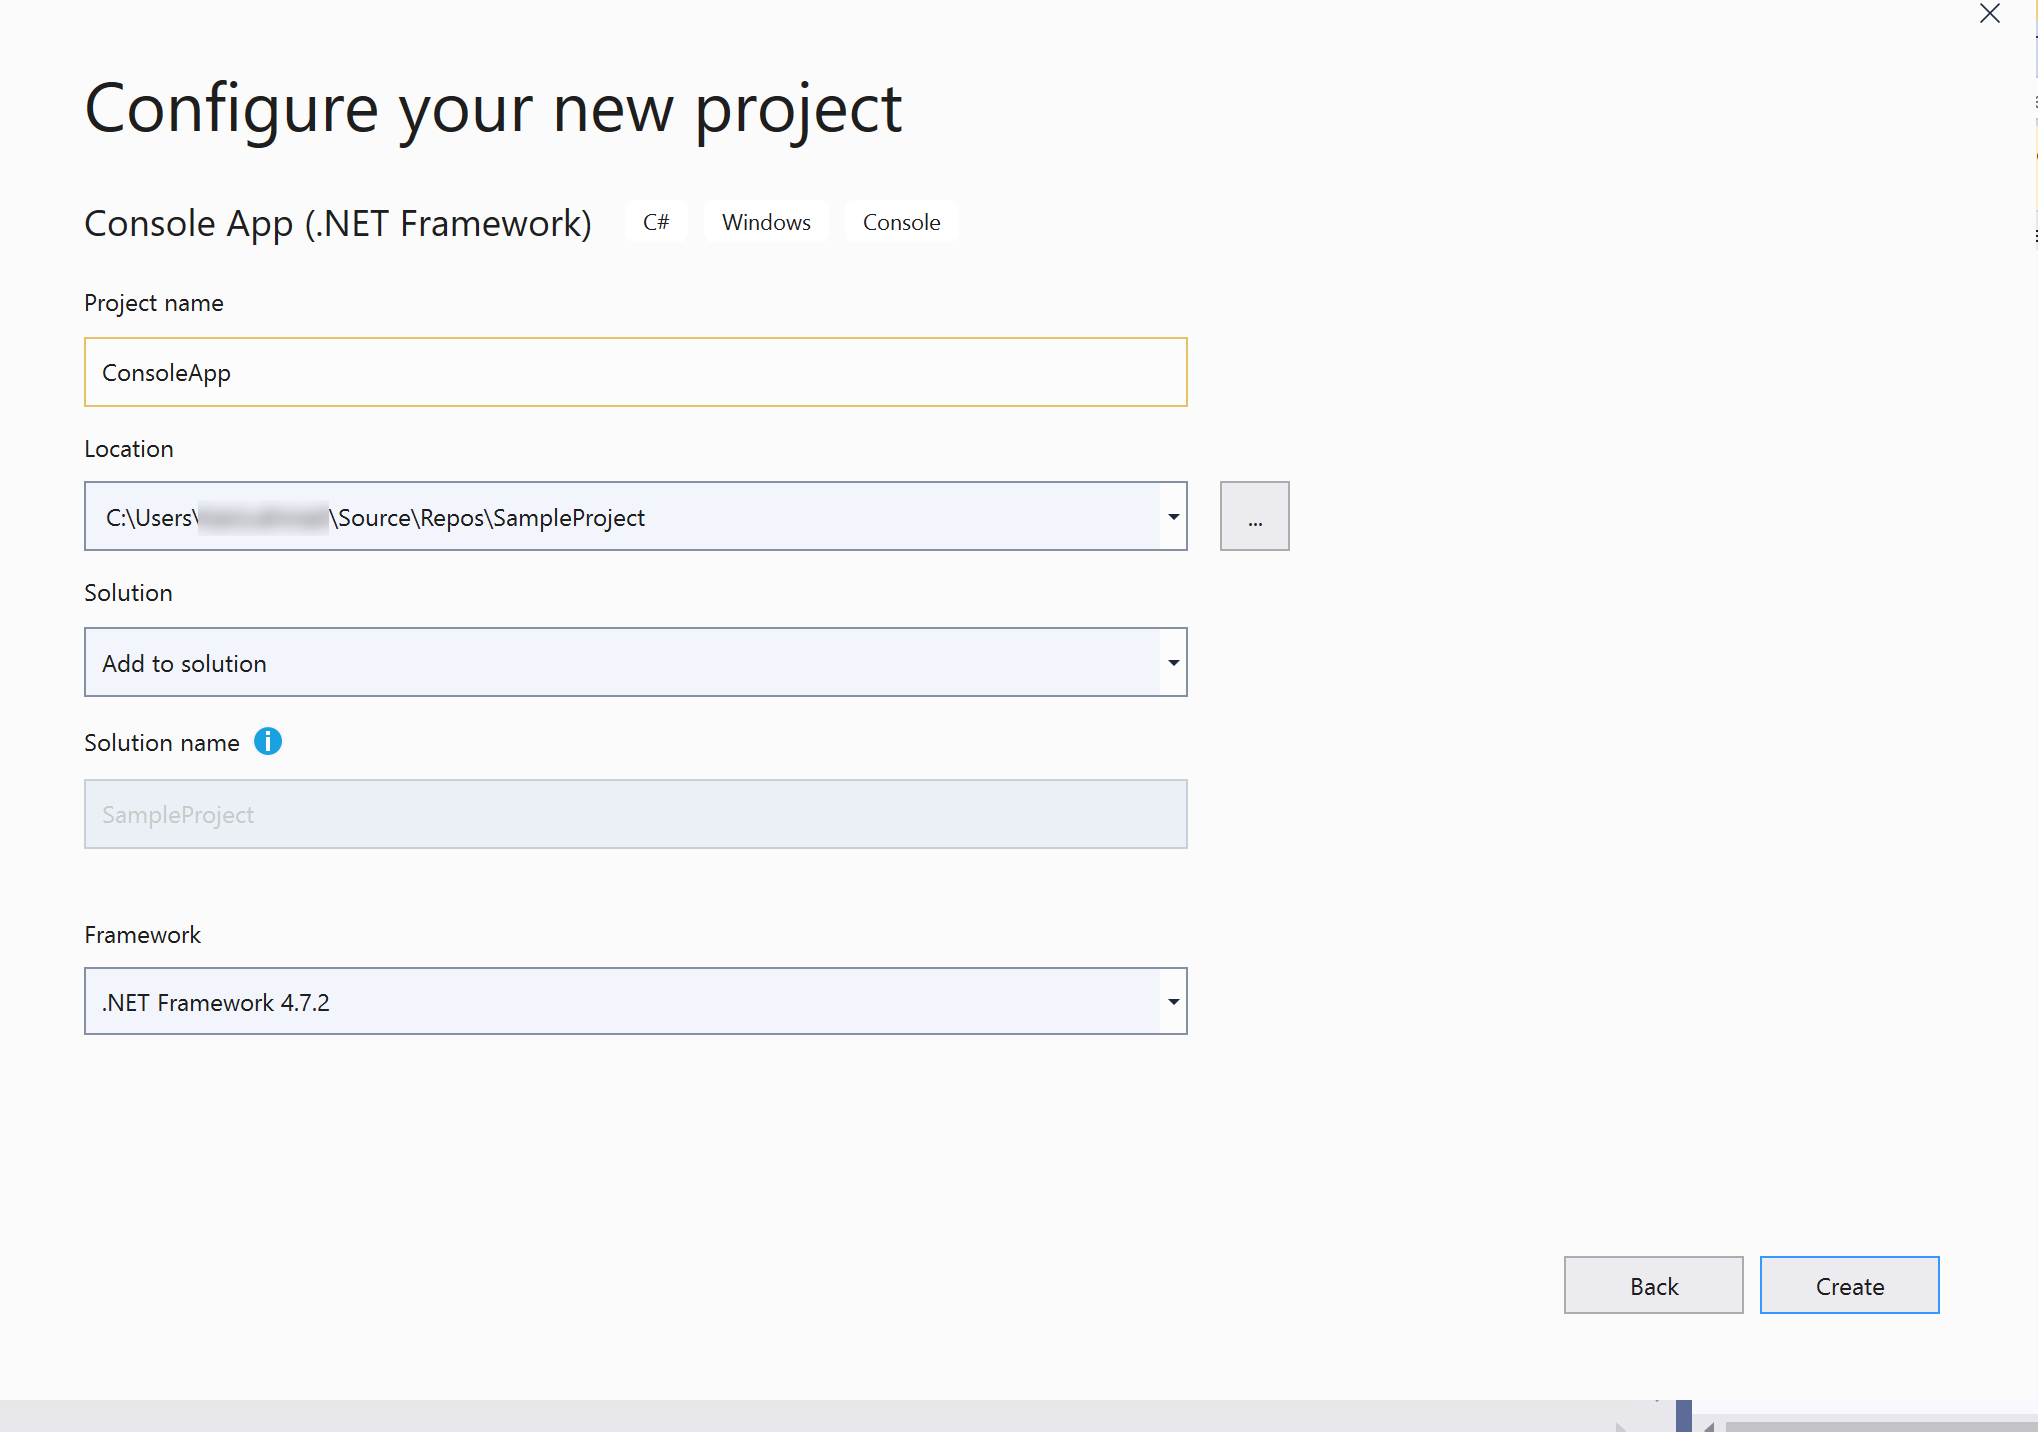
Create a new project in Visual Studio at the location where the repo was cloned.
Once the project is created, it can be pushed to the Git repo on Azure DevOps. Run the following command in the Git command window to push your changes to the remote repo.
git add --all
git commit -m "Initial Commit"
git push
- git add – all: Stage all changes.
- git commit: Commit the changes to the local repo. The m flag specifies the commit message. If you don’t pass the -m flag, a default text editor will open up for you to provide the commit message.
- git push: Push commits to the remote branch. You can also pass in the branch name like so: git push origin <feature branch>
At this time your Git repo in Azure DevOps should be populated with the recent commit.
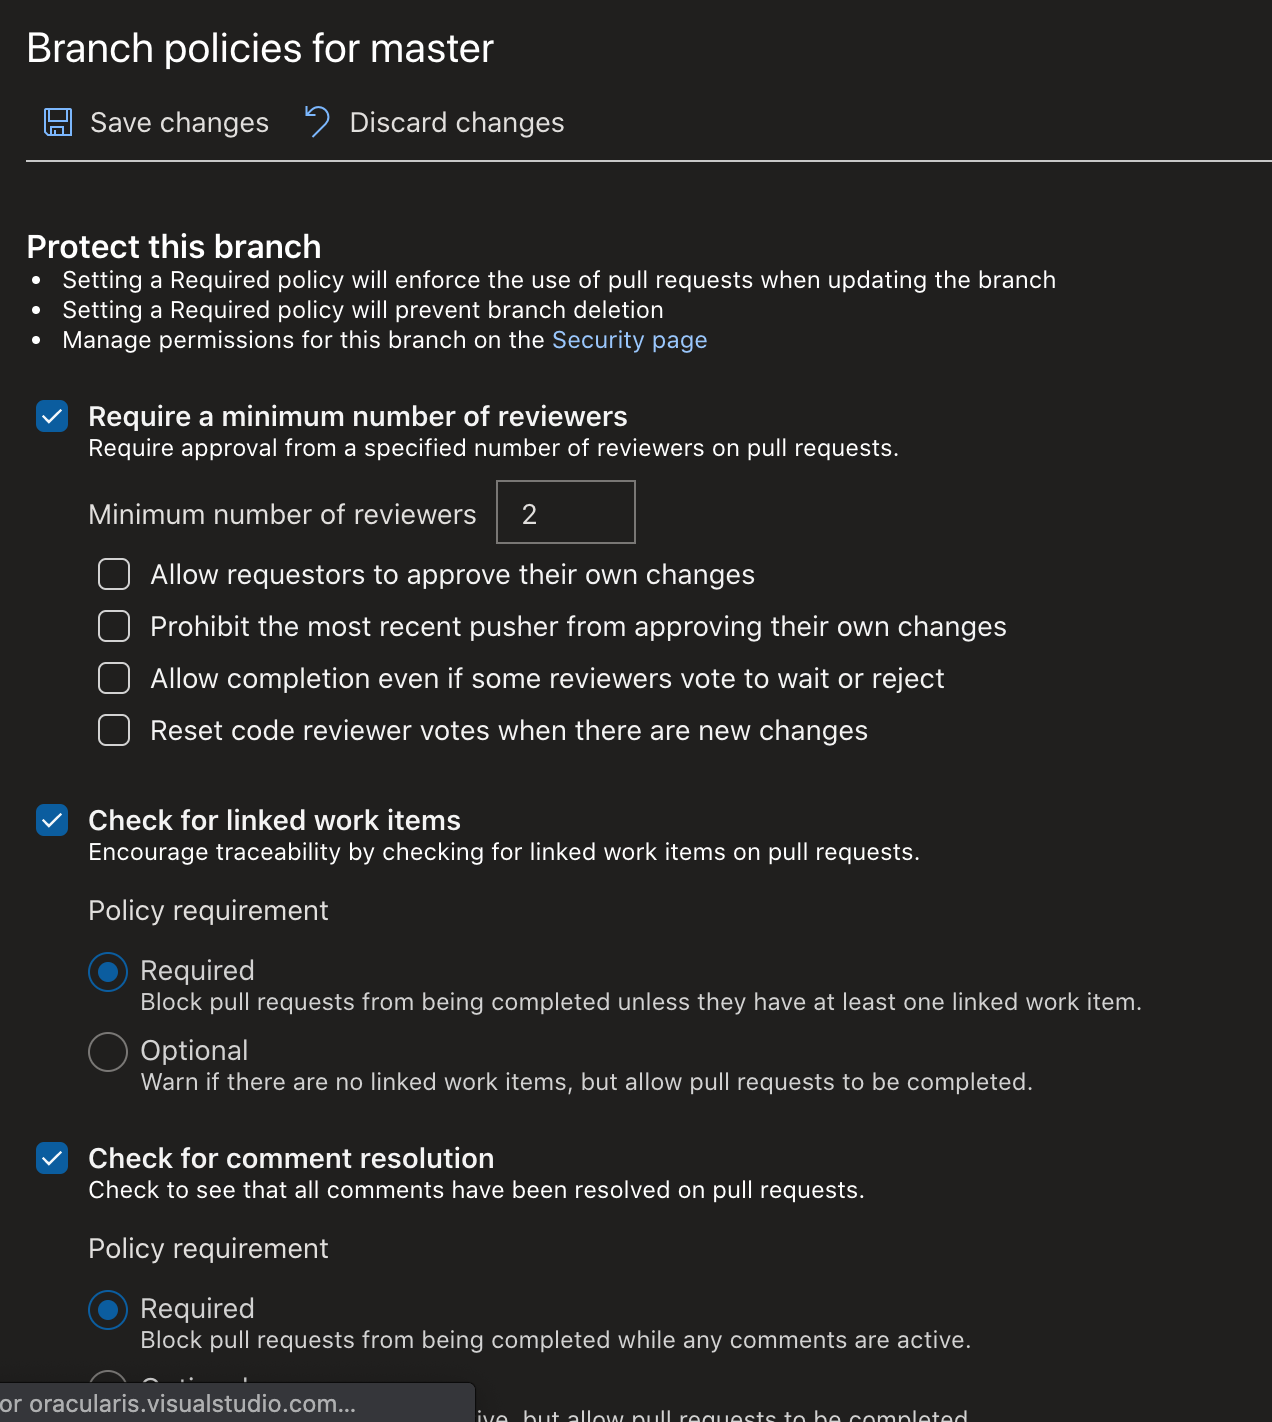
Configure Branch Policies
Navigate to Repos -> Branches on Azure DevOps and configure branch policies for the master branch. Branch policies are used to protect key branches(master branch in this case). Once a branch is protected, developers will need to create a pull request to merge their changes into a protected branch (more on this below). Now, let’s set the branch policies.
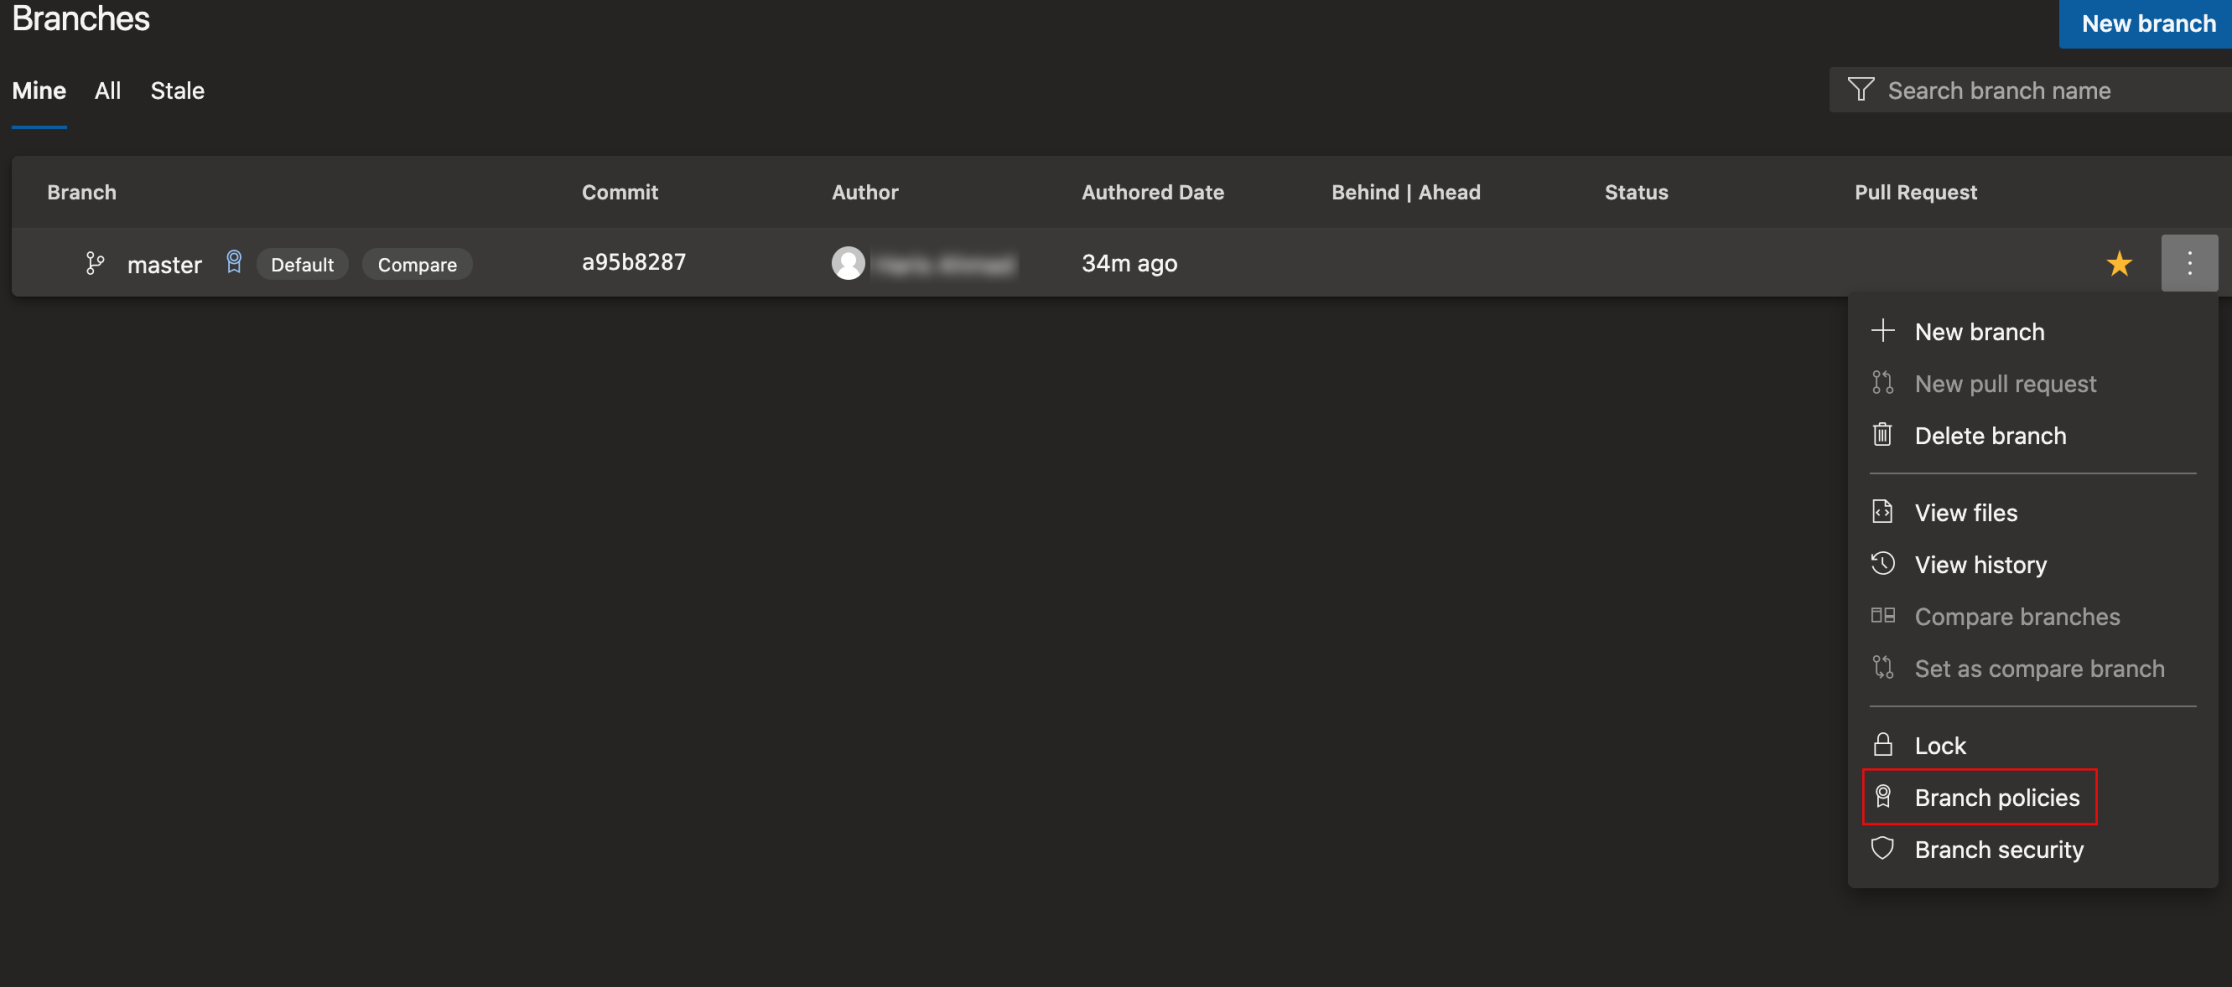
The branch policies must be met before the code can be merged into a protected branch. Some good to have policies are :
- Require a minimum number of reviewers. With this policy, the code cannot be merged until it has been reviewed.
- Check for linked work items. It is generally considered a best practice to link the development work with an associated work item.
- Check for comment resolution. This policy will ensure that all code reviewer comments have been resolved before the code is merged into the branch.
- Build Validation. Validate the code by pre-merging and building the pull request. The pull request cannot be completed until the code in the pull request builds successfully.
Development Workflow
Navigate to Boards -> Sprints and create a new Product Backlog Item.
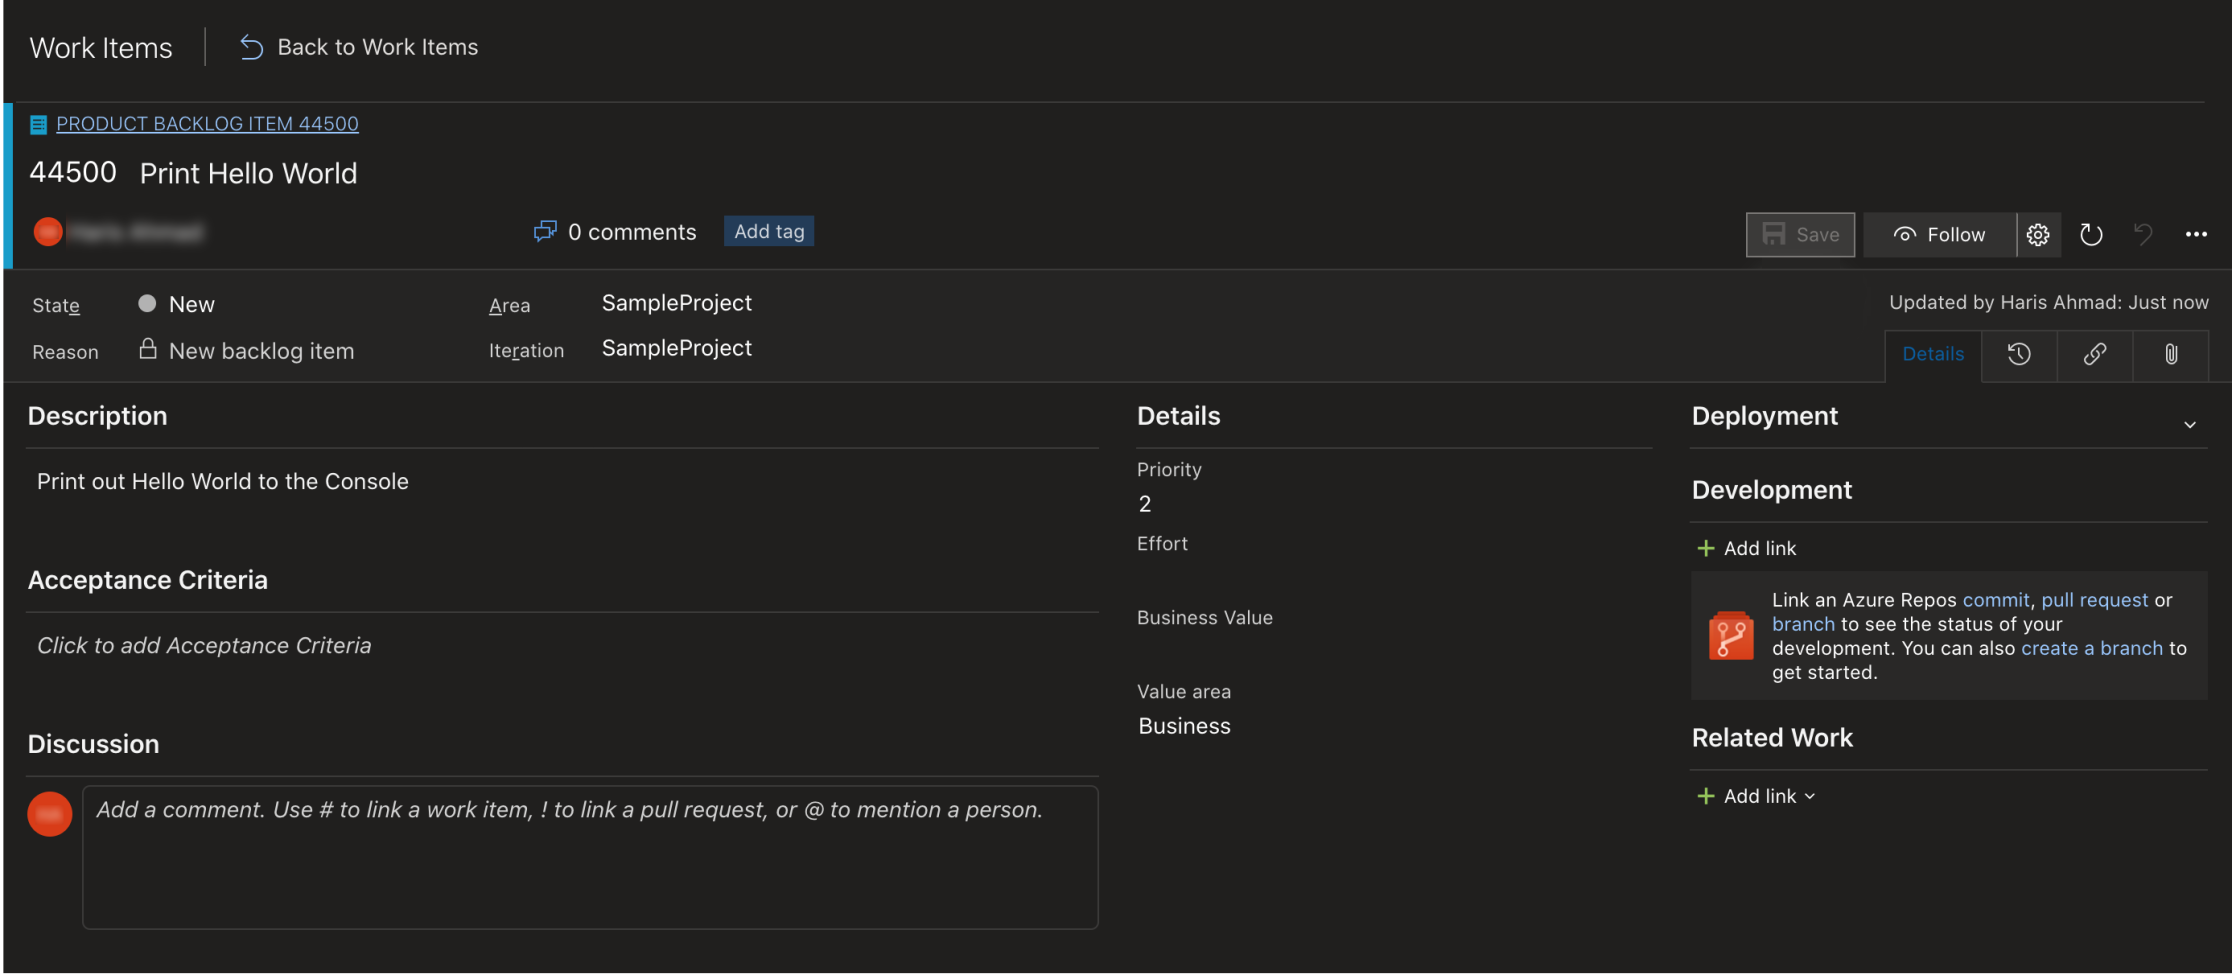
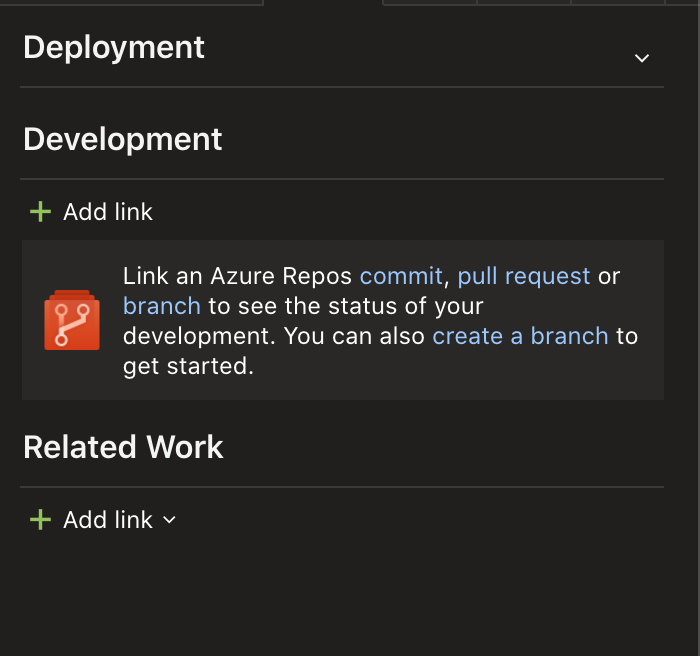
The Work Item Create/Edit screen enables the user to link the work item to an existing commit, pull request, or branch. A new branch can also be created from this screen.
Let’s go ahead and create a new branch from the work item. Click on create a branch to get started.
This will open a new popup to create a branch.
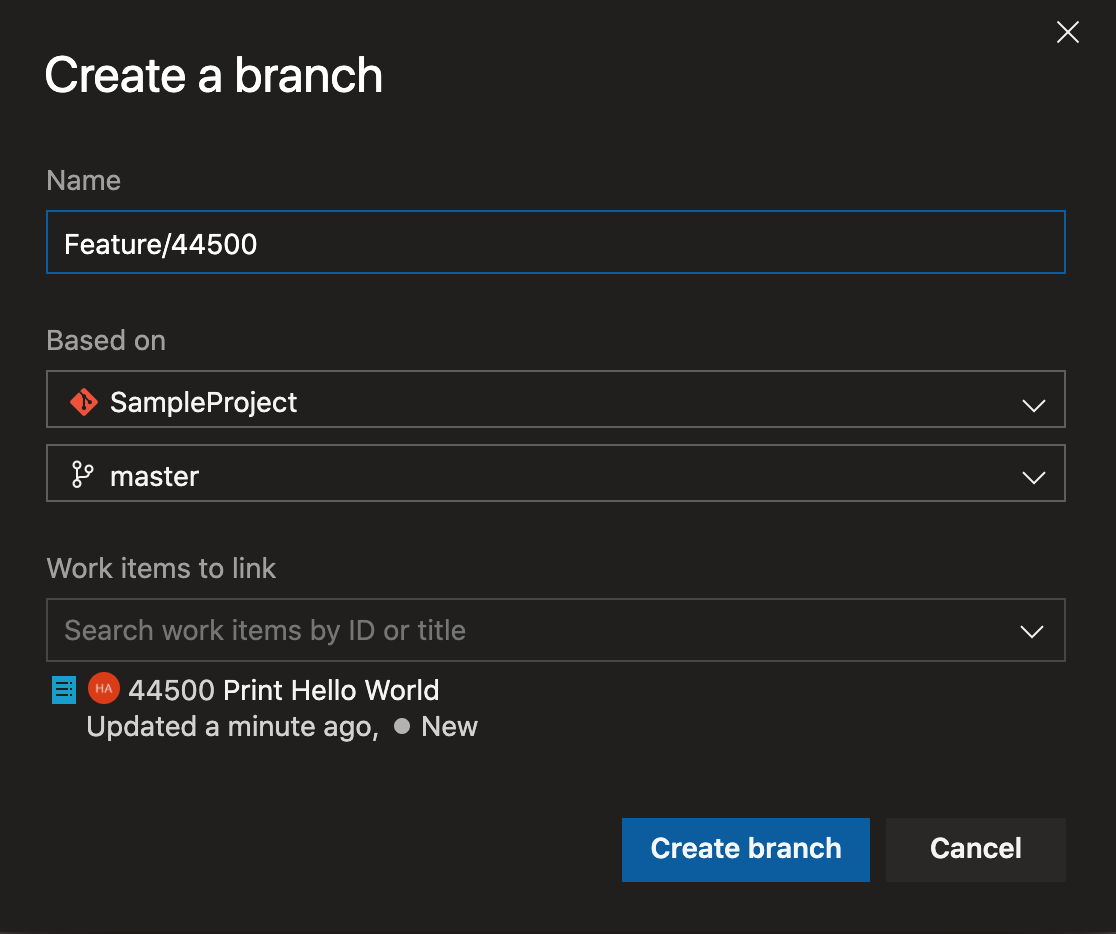
The naming convention used for the branch name is Feature/<work item id>. You can follow a convention for the branch name that works best for your organization.
Once the branch is created, go back to the Git command window on your machine and execute the following commands.
git pull
git checkout <branch name>
- git pull: Get the changes from the Azure DevOps to your machine, including the branch that was just created.
- git checkout <branch name>: Switch to the new branch that was just created.
You can now work on the backlog item in the development environment. After completing the development task, run the following commands to commit your changes and push to the remote repo.
git add --all
git commit -m "<your commit message>"
git push origin <feature branch>
Update Local Copy With Remote Changes
If you work in a team, you may have other team members contributing their changes to the repo on Azure DevOps. To ensure that you have the latest changes from others - run the following commands in the Git command window.
git checkout master
git pull origin master
git checkout <feature-branch>
git merge master
- git checkout master: Switch to master branch.
- git pull origin master: Get latest changes from Azure DevOps master branch.
- git checkout <feature-branch>: Change the active branch back to
- git merge master: Merge changes from the master branch into the feature branch.
Pull Request
Now that the development is complete, let’s create a pull request to merge the code into the remote master branch.
Remember, with the branch policies configured, you will not be able to commit your changes directly to the master branch.
Go to Repos -> Pull Requests and create a new pull request. Azure DevOps will automatically tie the work item to the pull request because the feature branch and the work item are already linked.
Add Reviewers and link to any additional work items as necessary.

The reviewers can directly provide their feedback on the Pull Request.

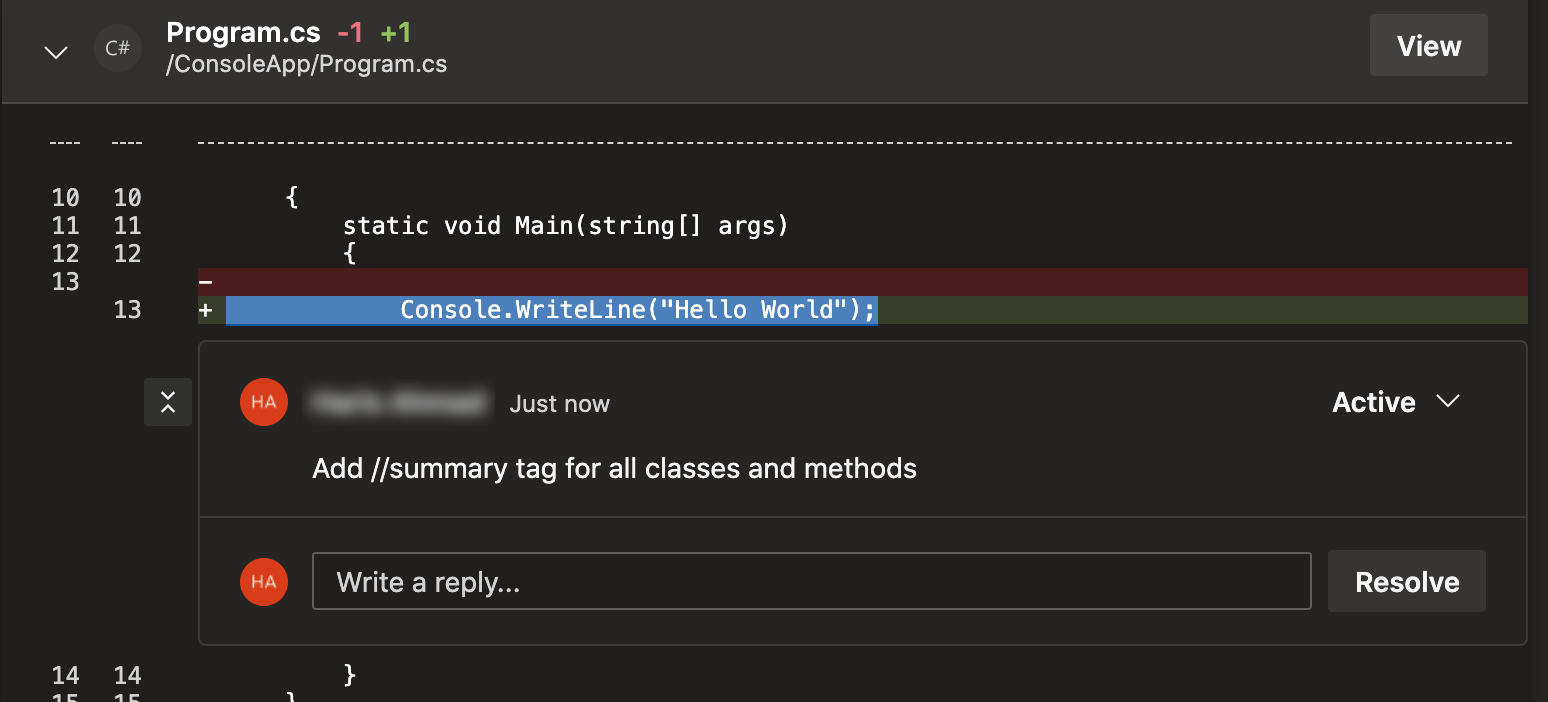
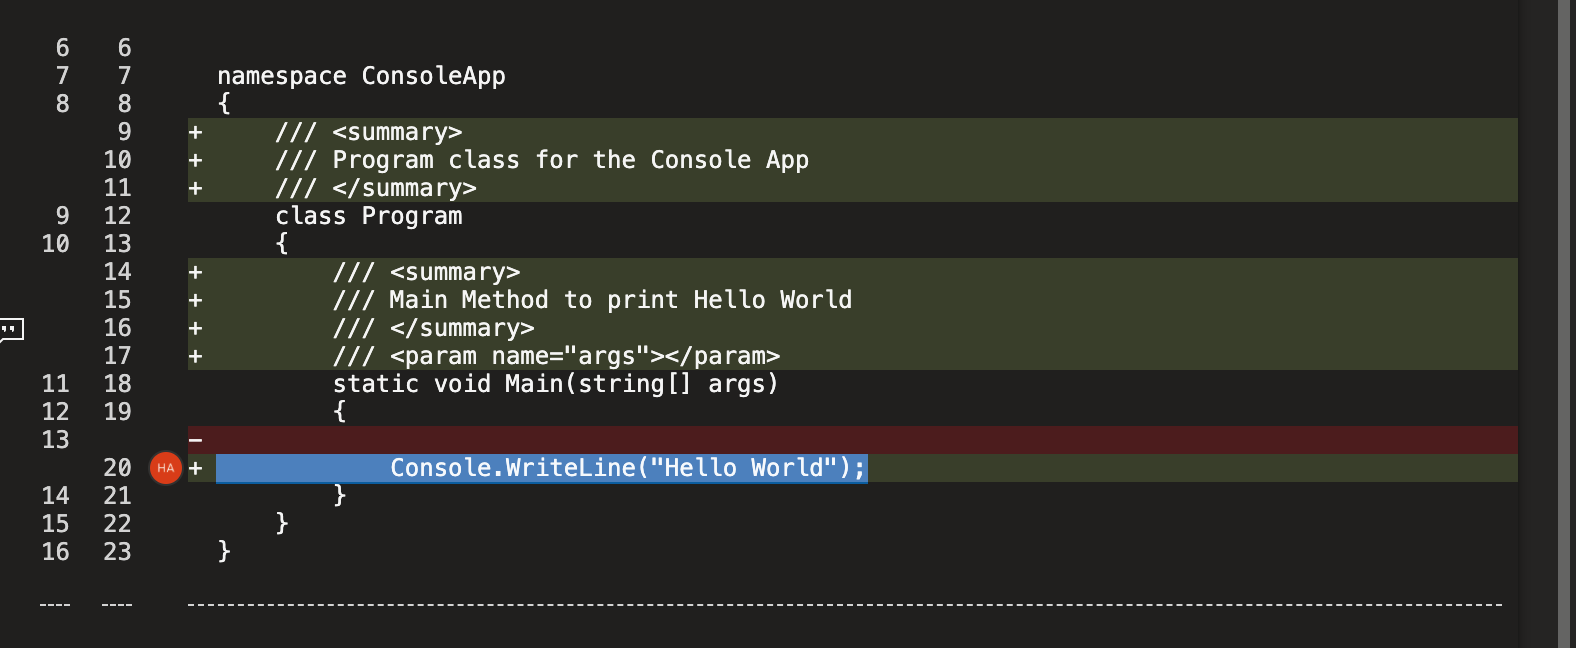
Based on the feedback from the code reviewer(s), you can go back to the development environment and implement suggested changes. Once you have completed the changes, run the following commands in the Git command window to push your changes to the remote branch, and update the pull request.
git add --all
git commit -m "<your commit message>"
git push origin <feature branch>
The latest changes are now available for the reviewer(s) to see. Once the reviewer(s) are satisfied with the changes, they can mark the comments as resolved and Approve the pull request.
After the pull request is approved, the owner of the pull request can either select Complete or Set auto-complete to complete the pull request and merge the code with the master branch. The difference between Complete and Set auto-complete is that Complete is only available when all policies have been met. Where-as Set auto-Complete can be configured beforehand and will complete the pull request as soon as all the configured policies are met.

Once the Complete/Set auto-complete button is clicked - a popup opens. The user has the option to:
- Select the merge type for the Pull Request
- Delete the source branch (<feature branch>).
- Mark a work item as complete.
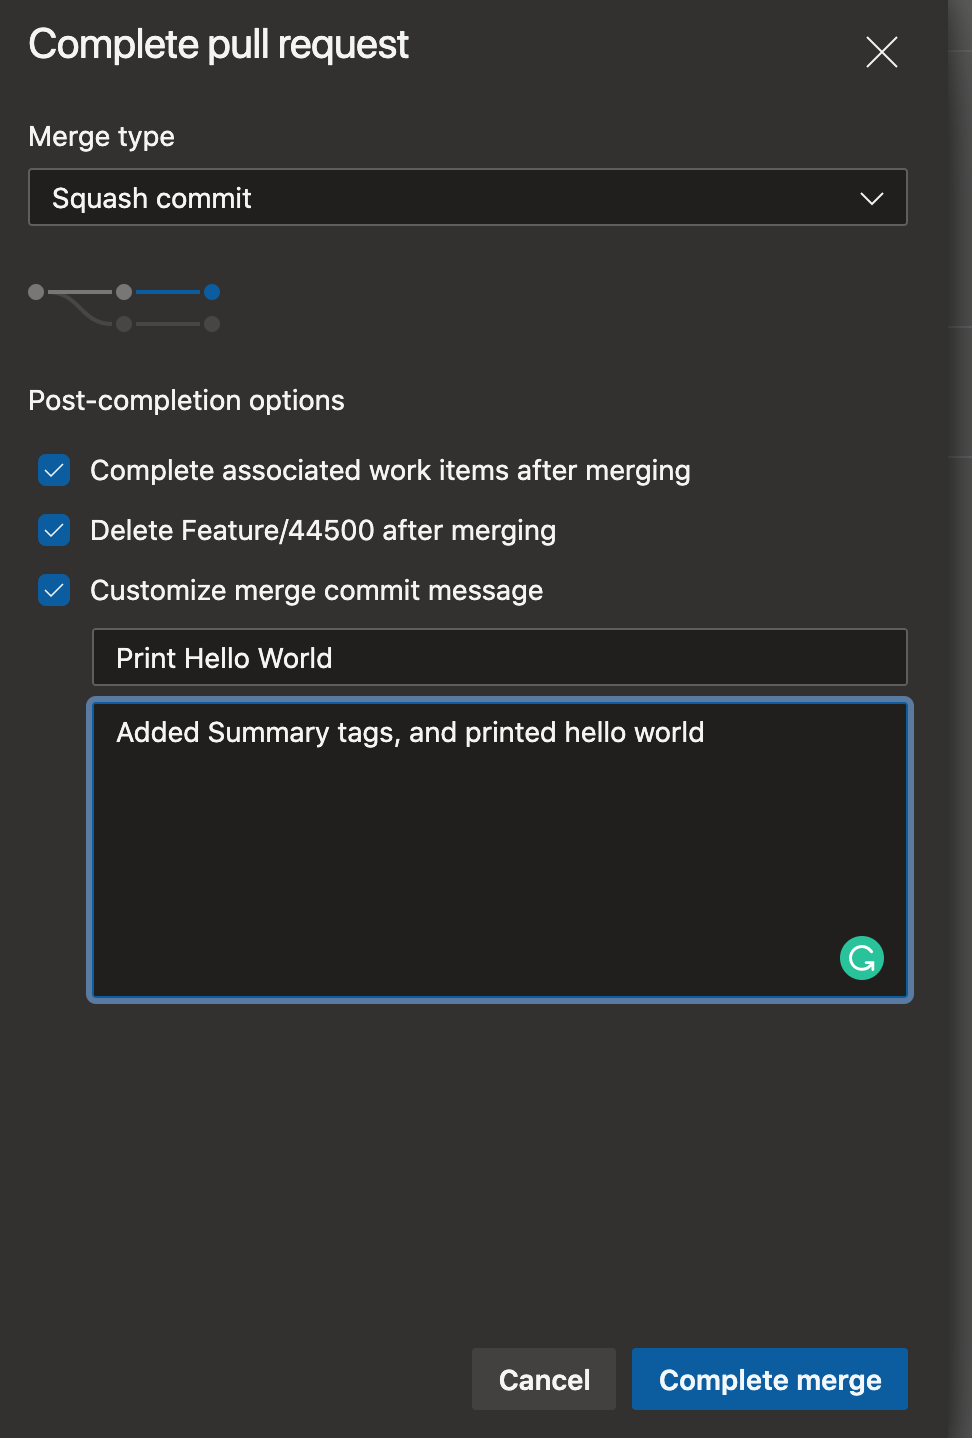
Select Complete merge to merge the feature branch into master and complete the pull request. Repeat the steps defined in the Development flow to continue working on additional enhancements/bugs.
This completes the quick guide. Let me know how you run your Azure DevOps workflows.